How to Add Optical Zoom Transitions for Dramatic Effects in CapCut Desktop Video Editor

Videos tell stories. A good story keeps people watching. Transitions help move from one scene to the next. They make videos look smooth and professional. One powerful transition is the optical zoom effect. It makes a scene zoom in or out, adding drama and focus. Filmmakers use it to highlight key moments. It can make action scenes intense and emotional scenes deeper.
CapCut Desktop makes adding this effect easy. It has many editing tools, including optical zoom transitions. You can use them to make your videos more engaging. CapCut offers free editing features, but some tools cost money. The optical zoom effect may be part of the paid plan. If you want advanced effects, you might need to upgrade.
This guide will show you how to add optical zoom transitions to your videos. Follow the steps to make your content look more dynamic and professional.

Why Use Optical Zoom Transitions?
Videos should keep the audience engaged. A dull video will not hold their attention. This is why transitions are important. They help move from one scene to another in a smooth way. Optical zoom transitions add more impact. They make videos look more dynamic.
These transitions create movement and depth. They pull the viewer into the scene. Instead of a sudden cut, the zoom effect blends two clips. This makes the video feel more natural. It also adds a professional touch.
There are many ways to use this effect. If you are editing an action scene, zooming in can add intensity. It moves feels fast and exciting. For storytelling, zooming out can create a dramatic reveal. It helps build suspense. If you want to highlight a detail, zooming in will guide the viewer’s eyes. It ensures they focus on the right part of the frame.
CapCut Desktop makes it easy to apply these effects. It has tools that help you adjust zoom speed and intensity. Even beginners can create smooth transitions. CapCut is one of the best video editors for pc options. It offers many tools at no cost. However, some features, like advanced transitions, may require payment.
Using optical zoom transitions can make a big difference. They add energy and keep the audience engaged. If used well, they can turn a simple video into something more exciting and professional.
Steps to Add Optical Zoom Transitions in CapCut Desktop
Step 1: Install and Open CapCut Desktop
To start, you need to download CapCut Desktop from its official website. This ensures you get the latest version without any security risks. After downloading, install the software and create an account. This step is quick and free.
Once installed, open the software. The user-friendly interface makes it easy to start editing right away. While CapCut offers many free tools, some advanced features, including certain transition effects, require payment.
CapCut is more than just a video editor. It also comes with useful tools like a caption generator. This tool adds subtitles to videos automatically, making content more engaging and accessible. If you’re creating content for social media or tutorials, this feature is a big help.
With CapCut installed, you’re ready to import your video and start editing.

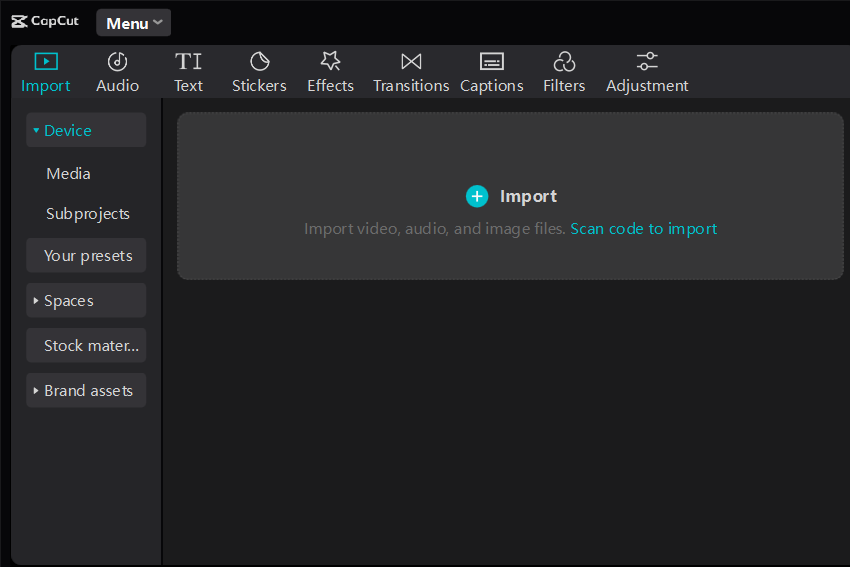
Step 2: Import Your Video Footage
Open CapCut and click on “Import” to add your video. You can drag and drop files into the timeline. The software supports multiple formats, so you won’t have trouble uploading.
Using high-quality footage is key. Clear visuals make transitions look smooth and professional. If needed, you can enhance your video using AI-powered tools. CapCut includes a free AI video generator, which helps create video content in minutes. This tool is useful if you need extra clips or animations for your project.
Once your video is in the timeline, you’re ready to apply optical zoom transitions.
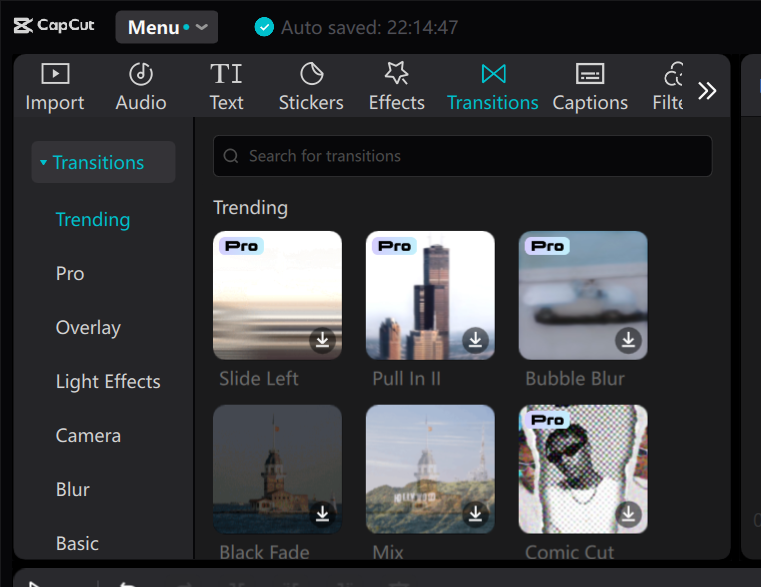
Step 3: Apply Optical Zoom Transition
Now, let’s add the optical zoom transition.
- Click the Transitions tab at the top.
- Scroll through the options and find “Optical Zoom”.
- Drag and drop the transition between the two clips.
CapCut allows you to adjust the transition settings. You can control:
- Zoom speed (how fast the effect happens).
- Zoom intensity (how much zoom is applied).
For a smooth effect, use a gradual zoom. This creates a cinematic look. If the zoom is too fast or intense, it might feel jarring.
Avoid overusing zoom transitions. Too much can distract you from the content. Instead, use them when needed to highlight important moments.
Keep in mind, that some zoom effects require a paid plan. If an effect is locked, you may need to upgrade it to access it.
Once you’ve applied the zoom, it’s time to preview and adjust it.
Step 4: Preview and Adjust
Before exporting, preview your video to make sure the transition looks smooth.
Click the play button and watch how the zoom effect moves between clips. If it feels too fast or slow, adjust the settings. You can:
- Shorten or extend the transition.
- Use the split tool to trim unnecessary parts.
- Adjust the speed for a better flow.
A well-placed zoom transition should feel natural. It should guide the viewer’s eye, not distract them. Once everything looks good, you’re ready to export the video.

Step 5: Export and Share
Click Export to save your final video. CapCut lets you choose resolution, frame rate, and format. For high-quality videos, select at least 1080p with a high bitrate.
After exporting, you can share your video on social media, YouTube, or other platforms. If you’re making content for an audience, a well-edited video keeps viewers engaged.
With CapCut, you can add cinematic zoom effects with ease. Try different settings and experiment with transitions to create stunning visuals.

Conclusion
Optical zoom transitions make videos more engaging. They add depth and movement, keeping viewers interested. These effects can make action scenes more intense and help shift focus smoothly between clips.
CapCut Desktop makes it easy to use optical zoom transitions. You can adjust the zoom speed and intensity to match your video’s style. If you want a subtle effect, use a slow zoom. If you want a dramatic look, increase the zoom speed. Experimenting with different settings will help you find what works best.
While CapCut offers many free tools, some advanced features require payment. If you need professional-quality effects, upgrading may be worth it.
Adding zoom transitions can take your videos to the next level. Try them in your next project to see the impact. A well-placed zoom can turn a simple clip into something exciting. Start editing today and bring more energy to your videos!
Alexia is the author at Research Snipers covering all technology news including Google, Apple, Android, Xiaomi, Huawei, Samsung News, and More.