External Hard Drive Not Recognized on Mac: How to Fix It

Like most Mac users, you’ve probably been in a situation where you connected an external Hard Drive to your Mac, but it did not appear on the connected devices. It’s a scenario that can leave you disappointed, especially when there are important files you need to access in the Drive.
Ideally, you expect the Hard Drive to pop up when you plug it into your Mac. It should either appear in Location, next to your Mac’s remote disk, or on the computer itself. Failure to show up on the Mac system means there’s probably an issue you must look into.
It could be a faulty cable, poor connection, or corrupt Hard Drive data. In this article, we’ll look into the issue of the external Hard Drive not showing on your Mac, the key reasons, and the steps you can take to fix it.
Let’s dive in
Why Mac doesn’t recognize your external Hard Drive
Your Mac may not recognize a mounted external Hard Drive for several reasons. Here are just a few of them
1. Poor connection
Sometimes, a simple, overlooked step can cause connectivity issues. Ensure the USB or HDMI cable linking your external device to the Mac is securely plugged in. A loose connection can hinder proper recognition.
2. Cable issues
Damaged connection cables could be why your Mac doesn’t recognize the external Drive. The damage can disrupt the connection even if it isn’t immediately visible. Start by testing with an alternate cable to rule out this possibility.
3. Lack of restart
Like any device, Macs benefit from periodic restarts and being shut down when not in use. Extended periods without a restart might lead to operational issues. Consider restarting your Mac by pressing the power button or restarting through the Apple menu.
4. Hardware problems
Sometimes, faulty Mac hardware, like a malfunctioning power supply or a problematic USB port, can hinder the connection. Try connecting a different external drive to your Mac to check for this.
5. Partition problems
Your external Hard Drive might have some ‘bad sectors,’ like worn-out parts that you can’t visibly see. These damaged areas can make it tough for your Mac to read the Drive properly.
6. Outdated driver
Just like you need the right key for a specific lock, your Mac needs the proper ‘driver’ to understand your external Hard Drive. If this driver is outdated, then it’ll experience problems recognizing any drives mounted into it.
How to fix the external drive not being recognized on the Mac
Encountering difficulties with an external Drive on your Mac can be quite challenging at first. However, it’s an issue you can easily fix—provided it doesn’t run deep. But before that, you should be first sure about performing the repairs yourself.
If not, it’s advisable to seek assistance from an authorized service provider.
Here are various solutions step-by-step to assist you in fixing a Hard Drive not showing on your Mac.
1. Check the connecting cable
The first step is to ensure that the external drive is properly connected. However, sometimes, the issue might stem from the cable itself. Some drives require more power than others, and using an insufficient cable might lead to mounting failures.
To fix the issue, try using an alternate cable or connecting the drive to a different USB port on your Mac. Consider using a self-powered USB hub or an external power source to provide the necessary energy to the drive.
2. Test the drive on another Mac or PC
Sometimes, your Mac may fail to recognize the external drive due to issues related to the Hard Drive itself. So, it’s crucial to determine whether the issue lies with the drive or your Mac before pursuing extra steps.
For instance, you can test the drive on another Mac. The issue likely resides with the drive if it fails to mount there. Equally, the problem may be with your Mac if it mounts successfully. Trying the drive on a PC can also help identify issues.
If it mounts on the PC but not on your Mac, it could indicate the drive is formatted for PCs and isn’t compatible with your Mac.
Not all external drives are optimized for Macs. There are ways you can check and ascertain this:
- Go to Apple

- Select About This Mac

- Click Storage

Check and find out if the external drive shows up here. You can also choose the menu option and select System Report to find out more details about the Hard Drive.
3. Utilize Disk Utility
Disk Utility is a comprehensive solution for various Mac-related issues, especially those concerning external drives. It can access and resolve disk problems, among other system-wide checks.
To use Disk Utility effectively:
- Open Finder
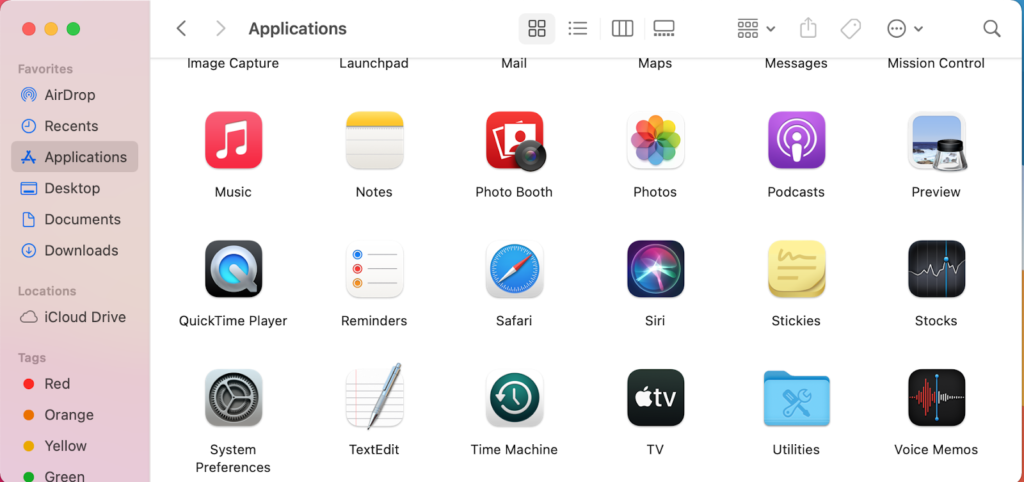
- Navigate to Applications and access the Utilities folder

- Click on Disk Utility.
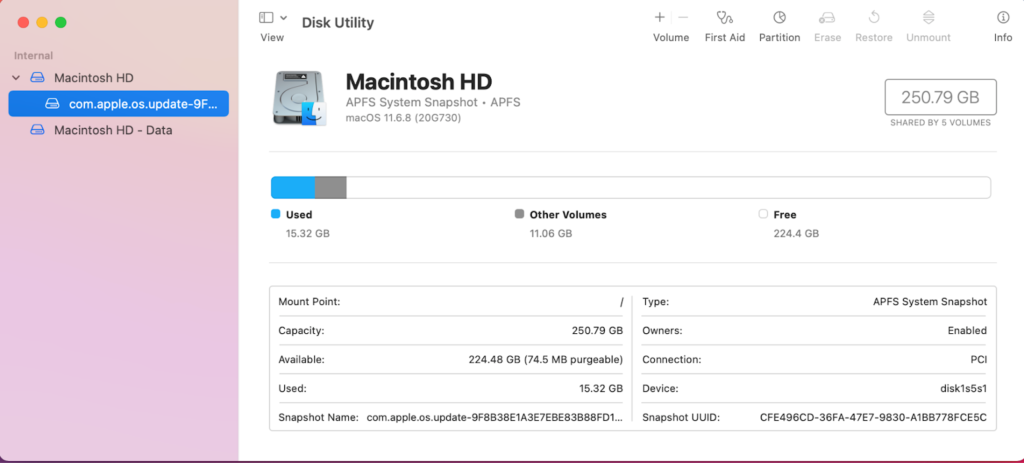
Once Disk Utility is launched, you can verify if the external drive is detected. Here’s how to check:
- Expand the View menu located at the top of the screen

- Select Show All Devices
4. Run first aid
When your external Hard Drive is detected but inaccessible, it’s likely due to a file system problem. You can attempt to resolve this using the First Aid feature, enabling access to your files.
The First Aid tool is available in Disk Utility and is designed to check for common errors on Mac and undertake necessary repairs. It validates and rectifies various issues concerning both startup Hard Drives and external drives.
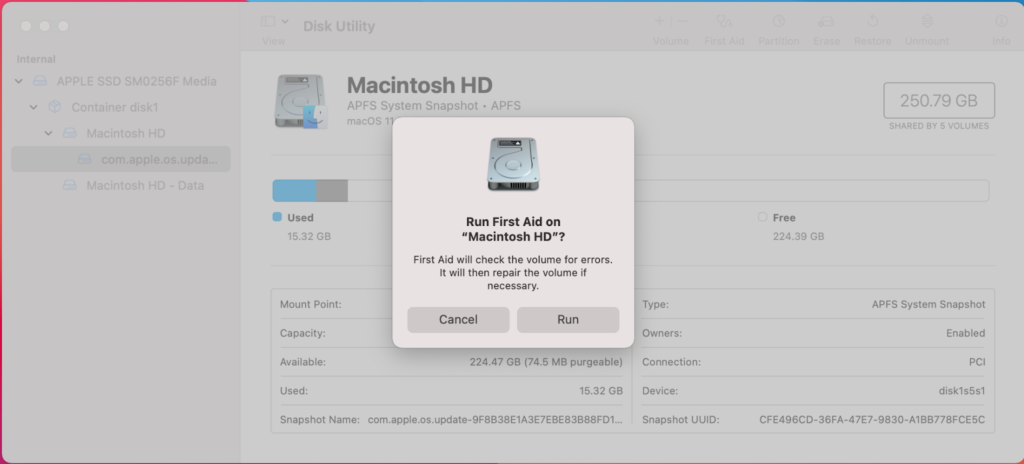
Here’s how to run First Aid on an external Hard Drive:
- Open Utilities

- Navigate to Disk Utility

- Select the external Hard Drive, go to the First Aid tab, and initiate diagnostics by clicking Run.
5. Reboot and Update your Mac
If your hard disk isn’t detected in macOS, it could be an issue with the operating system. Rebooting your Mac might resolve some data damage issues. To do this:
- Navigate to the Apple menu

- Click on Restart.

- You can also press and hold the power button. Click Restart when the dialog box appears.
Rebooting your Mac essentially refreshes the system’s memory and initiates a fresh startup, resolving issues causing the external Hard Drive to remain undetected.
How to avoid external Hard Drive mounting issues on Mac
You can take a few steps to avoid Hard Drive-related issues on your Mac. Here’s a look at some of them
1. Keep clean USB connections
Always keep your USB ports clean and free from any dirt. Not taking this measure results in poorly connected USB ports short circuits, which may cause external Hard Drives to either not show up on your Mac or encounter difficulties in data access.
2. Utilize reliable power sources
Lack of enough power supply to your external Hard Drive is one of the reasons for the strange behavior that leads to mounting issues on your Mac. To avoid this, connect the Hard Drive to a stable power source to prevent power-related disruptions.
3. Regularly update system software
It’s always advisable to update your Mac regularly. This helps patch all the lingering vulnerabilities, such as compatibility issues with external devices. If your macOS is up to date, you’ll seamlessly mount external Hard Drives on your device without any glitches.
4. Always properly eject the device
Removing a drive incorrectly can lead to data corruption, rendering it unrecognizable by your Mac in the future. Safely ejecting the USB device clears the Write cache and stops background operations, safeguarding the data from potential damage caused by abrupt removal.
5. Monitor disk health and perform regular maintenance
Apple provides you with disk management tools such as Disk Utility to monitor the health of your external Hard Drive. Use the tool to regularly check for errors and perform routine maintenance tasks to keep the drive healthy and prevent mounting issues.
Final thoughts
A Hard Drive not detected on your Mac can mean many things. The first step is to establish the reason for this behavior and take the necessary proactive action to fix it. Some of the above-shared measures will help you get started in troubleshooting the problem and ensuring your Mac and external Hard Drives are well taken care of.
Alexia is the author at Research Snipers covering all technology news including Google, Apple, Android, Xiaomi, Huawei, Samsung News, and More.